


Summary :
Plugins extend functionality or add new features to your WordPress websites. Plugins are written in PHP Language. As Themes change the look of the website Plugins are Responsible for changing the functionality.
Why Plugins ?
Plugins help in hacking into the WordPress to add the desired functionality. Like for example I wanted to add Google Analytics code to my website and to do that there is no provision to do that by default. One of the simplest way (though not recommended) is to open the Theme Editor available and putting the code into the header file. Now this is not good because once the theme is updated the code that you added will be replaced by the Updated theme. Another reason is that its comparatively difficult to find and update again.
Now with the help of a plugin we can do that easily.
There is no dearth of plugins which are available online for WordPress and for the same reason WordPress is world #1 CMS. But sometime as a developer you need something very unique and here is where you can actually write your own plugin.
Writing a simple Google Analytics Plugin.
To get started with our first plugin lets take a real world example of adding a plugin that gives interface to add a Google Analytics code to save it into WordPress Settings and then display it on the <head> section of the front end pages.
Step 1 : Setting up the Plugin Structure
Browse to “wp-contents/plugins” folder on your wordpress installation and create a folder called “google-analytics”. Inside the folder create a file “google-analytics.php”.
Step 2 : Add Plugin Meta
In your google-analytics.php we will add some meta data so that WordPress can know the Name and other details about our Plugin.
<?php
   /*
   Plugin Name: Google Analytics
   Plugin URI: iamshishir.com
   description: Allows you to Embed Google Anaytics to your Webpage.
   Author: Shishir Raven
   Author URI: https://iamshishir.com
   License: GNU
   */
?>
Only Plugin Name is mandatory requirement but it is always recommended to add more details if you want to share the plugin with other users.
At this moment is a functional WordPress plugin you would be able to see the plugin appear under Plugins and you can also activate the plugin. But the plugin will of course do nothing.
Step 3 : Creating a master class.
In this step we will just add a master class called “googleAnalytics”
class googleAnalytics
{

	public function __construct()
	{
		$this->plugin               = new stdClass;
		$this->plugin->name         = 'google-analytics'; // Plugin Folder
		$this->plugin->displayName  = 'Embed Google Analytics'; // Plugin Name
		$this->plugin->version      = '1';
	}
}
$oyeGA = new googleAnalytics();
Here we just create our master class and in constructor we add a few settings inside a stdClass in $this->plugin.
Step 4 : Let’s add our own menu item under Settings in the admin section.
Add the following function to our class. This function when called will basically add a menu under Settings and when clicked with look for “settingsPage” function to execute.
You can also read more documentation about the function add_submenu_page on the wordpress documentation.
function adminPanel()
{
add_submenu_page(
//$parent_slug -
'options-general.php', // Slug for main settings
// Page Title
'Google Analytics Setting',
// Menu title
"Oye Google Analytics",
// Capablity
'manage_options',
// Menu Slug
'google-analytics',
//callable $function = ''
array( $this, 'settingsPage' ) );
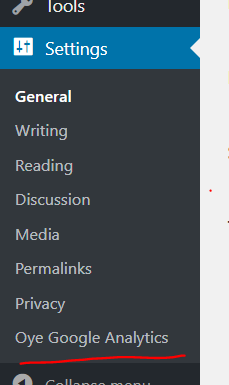
}Since we want to call this function when admin panel we need to register this on admin_menu hook.
add_action( 'admin_menu', array( &$this, 'adminPanel' ) );Add the above code inside constructor. Once you do this you should see a new menu appear under Settings Tab in Admin panel.
Step 5 : Registering a new Setting on WordPress.
Since we will be saving the the Embed Code on google we need storing space. We can do so by registering a new setting into wordpress.
You can use the following code to do so.
function registerSettings()
{
	register_setting( $this->plugin->name, 'oye_google_analytics_embed', 'trim' );
}
When this function will be called a new setting ‘oye_google_analytics_embed’ will be registered. Think this as of some storage space.
We want this setting to be registered just as the admin in started we will use the “admin_init” hook. You need to copy this to the class constructor.
add_action( 'admin_init', array( &$this, 'registerSettings' ) );Step 5 : Creating the page that will open when the “Oye Google Analytics” menu is clicked.
We already registered a function to “settingsPage” to be called when the menu item is clicked. Now we will define that function.
This following function performs the following.
- Check if the user trying to open the page is Admin.
- Check if this page is a page which has been submitted by the form.
- Check nonce : this is simply a security utility inside wordpress. Read more about nonce.
- If everything is fine it inserts the data using. update_option in wordpress and sets the success message.
- Loads the settings into settings property using get_option
- Include the page that contains the Settings from.
function settingsPage()
{
	// only admin user can access this page
	if ( !current_user_can( 'administrator' ) ) {
		echo '<p>' . __( 'Sorry, you are not allowed to access this page.', $this->plugin->name ) . '</p>';
	return;
}

// Save Settings
if ( isset( $_REQUEST['submit'] ) ) {
	// Check nonce
	if ( !isset( $_REQUEST[$this->plugin->name.'_nonce'] ) )
	{
		// Missing nonce
		$this->errorMessage = __( 'nonce field is missing. Settings NOT saved.', $this->plugin->name );
	}
	elseif ( !wp_verify_nonce( $_REQUEST[$this->plugin->name.'_nonce'], $this->plugin->name ) )
	{
		// Invalid nonce
		$this->errorMessage = __( 'Invalid nonce specified. Settings NOT saved.', $this->plugin->name );
	}
	else
	{
		// Save
		// $_REQUEST has already been slashed by wp_magic_quotes in wp-settings
		// so do nothing before saving
		update_option( 'oye_google_analytics_embed', $_REQUEST['oye_google_analytics_embed'] );
		$this->message = __( 'Settings Saved.', $this->plugin->name );
	}
}

// Get latest settings
$this->settings = array(
'oye_google_analytics_embed' => esc_html( wp_unslash( get_option( 'oye_google_analytics_embed' ) ) )
);

// Load Settings Form
include_once( WP_PLUGIN_DIR . '/' . $this->plugin->name . '/views/ga_settings.php' );

}
Step 6 : Create the Settings Page View.
Basically this is the page which we include on the settingsPage() function. Called ga_settings.php. Inside this page we just need to have a form which will be prefilled with the current settings.
<div class="wrap">
    <h2><?php echo $this->plugin->displayName; ?> » <?php _e( 'Settings', $this->plugin->name ); ?></h2>

    <?php
    if ( isset( $this->message ) ) {
        ?>
        <div class="updated fade"><p><?php echo $this->message; ?></p></div>
        <?php
    }
    if ( isset( $this->errorMessage ) ) {
        ?>
        <div class="error fade"><p><?php echo $this->errorMessage; ?></p></div>
        <?php
    }
    ?>

    <div id="poststuff">
    	<div id="post-body" class="metabox-holder columns-2">
    		<!-- Content -->
    		<div id="post-body-content">
				<div id="normal-sortables" class="meta-box-sortables ui-sortable">
	                <div class="postbox">
	                    <h3 class="hndle"><?php _e( 'Settings', $this->plugin->name ); ?></h3>

	                    <div class="inside">
		                    <form action="options-general.php?page=google-analytics" method="post">
		                    	<p>
		                    		<label for="oye_google_analytics_embed"><strong>
		                    			<?php _e( 'Paste Google Analytics Code', $this->plugin->name ); ?>

		                    			</strong></label>
		                    		<textarea name="oye_google_analytics_embed" id="oye_google_analytics_embed"
		                    		class="widefat" rows="8" style="font-family:Courier New;"><?php echo $this->settings['oye_google_analytics_embed']; ?></textarea>
		                    		<?php _e( 'These Google Analytics code will be  printed in the <code><head></code> section.', $this->plugin->name ); ?>
		                    	</p>
		                    	<?php wp_nonce_field( $this->plugin->name, $this->plugin->name.'_nonce' ); ?>
		                    	<p>
									<input name="submit" type="submit" name="Submit" class="button button-primary" value="<?php _e( 'Save', $this->plugin->name ); ?>" />
								</p>
						    </form>
	                    </div>
	                </div>
	                <!-- /postbox -->
				</div>
				<!-- /normal-sortables -->
    		</div>
    		<!-- /post-body-content -->

    		<!-- Sidebar -->
    		<div id="postbox-container-1" class="postbox-container">
    			<?php require_once( WP_PLUGIN_DIR . '/' . $this->plugin->name . '/views/sidebar.php' ); ?>
    		</div>
    		<!-- /postbox-container -->
    	</div>
	</div>
</div>
Once you finish this step you would see a page as following.
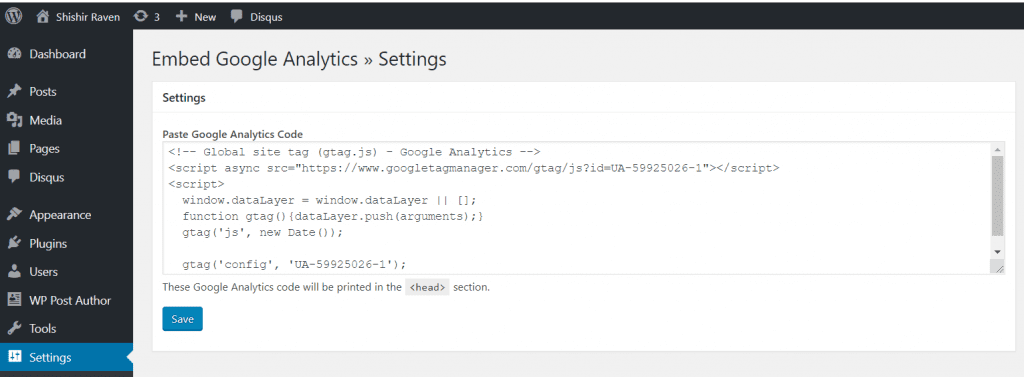
At this point all you would be able to save settings into wordpress.
Step 7 : Showing this Embed code on head section on front end.
Add a frontend hook.
// Frontend Hooks
add_action( 'wp_head', array( &$this, 'putToHeader' ) );
And add a function which is called
function putToHeader()
{
	// Get meta
	$meta = get_option( 'oye_google_analytics_embed' );
	if ( empty( $meta ) )
	{
		return;
	}

	if ( trim( $meta ) == '' ) {
		return;
	}
	// Output
	echo wp_unslash( $meta );
}
Now if you add Google Analytics code in your settings you should see the same when you observe the source of your front end page.
Hope this article might have helped you learn the basics about the WordPress plugins. Please leave your comments below.
Leave a Reply
You must be logged in to post a comment.